
N1搭建Hexo个人博客,部署博客到Github
N1刷的是 Armbian 系统设备,访问 npm 官方源速度较慢,先切换国内源
查看当前 npm 镜像源
1 | npm config get registry |
切换到淘宝源
1 | npm config set registry https://registry.npmmirror.com |
一,安装 Nodejs
1,安装Nodejs,nodejs官网
下载并安装 nvm
1 | curl -o- https://raw.githubusercontent.com/nvm-sh/nvm/v0.40.6/install.sh | bash |
代替重启 shell
1 | \. "$HOME/.nvm/nvm.sh" |
下载并安装 Node.js,这里安装的22版本
1 | nvm install 22 |
验证 Node.js 版本
1 | node -v |
验证 npm 版本
1 | npm -v |
2,安装 Git
1 | apt install git |
验证 git 版本
1 | git -v |
二,安装 Hexo
1 | npm install hexo-cli -g |
Hexo 查看版本
1 | hexo v |
提示如下图说明安装成功,出现 warn 执行第4步
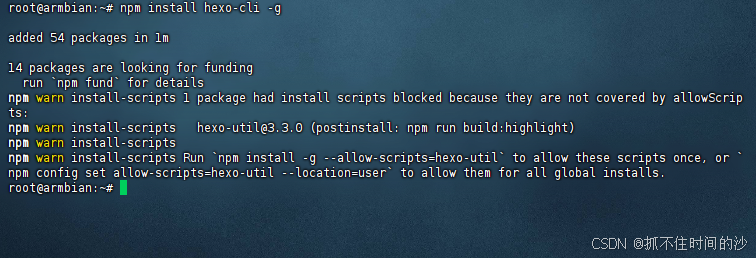
如果要卸载Hexo重装,执行下面命令
1 | npm uninstall hexo-cli -g |
验证是否卸载成功
1 | hexo -v |
为了确保彻底干净,特别是如果你打算重新安装 Hexo,建议清理 npm 缓存
清理 npm 缓存
1 | npm cache clean --force |
1,新建一个文件夹作为博客根目录
1 | mkdir mylog |
2,初始化博客,生成 Hexo 博客文件
1 | hexo init |
3,安装依赖
1 | cd mylog |
如果安装依赖提示如下图,这些 warn 只是警告,不是错误,不影响使用
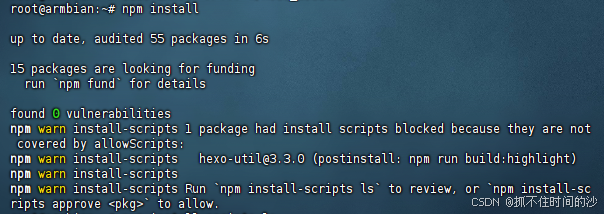
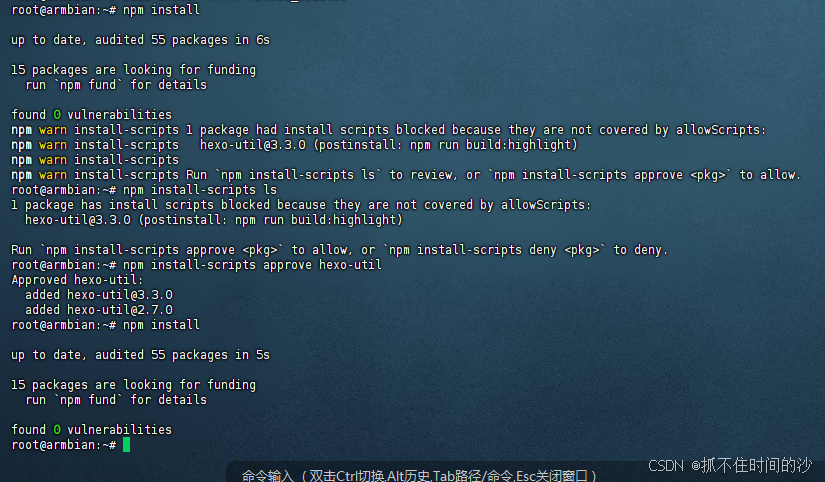
4,可执行下面命令不再拦截
1 | # 1. 查看当前被拦截的脚本列表(确认是 hexo-util) |
1 | # 2. 全局允许 hexo-util 运行安装脚本 不再拦截 |
1 | # 3. 重新安装依赖 |
5,启动 hexo,本地预览
1 | cd mylog |
1 | hexo s |
重新连接后需要进博客文件夹启动 hexo
1 | cd mylog |
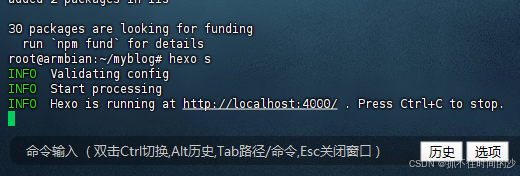
提示上面的说明启动成功,打开地址即可访问博客了,IP:4000
1 | http://localhost:4000/ |
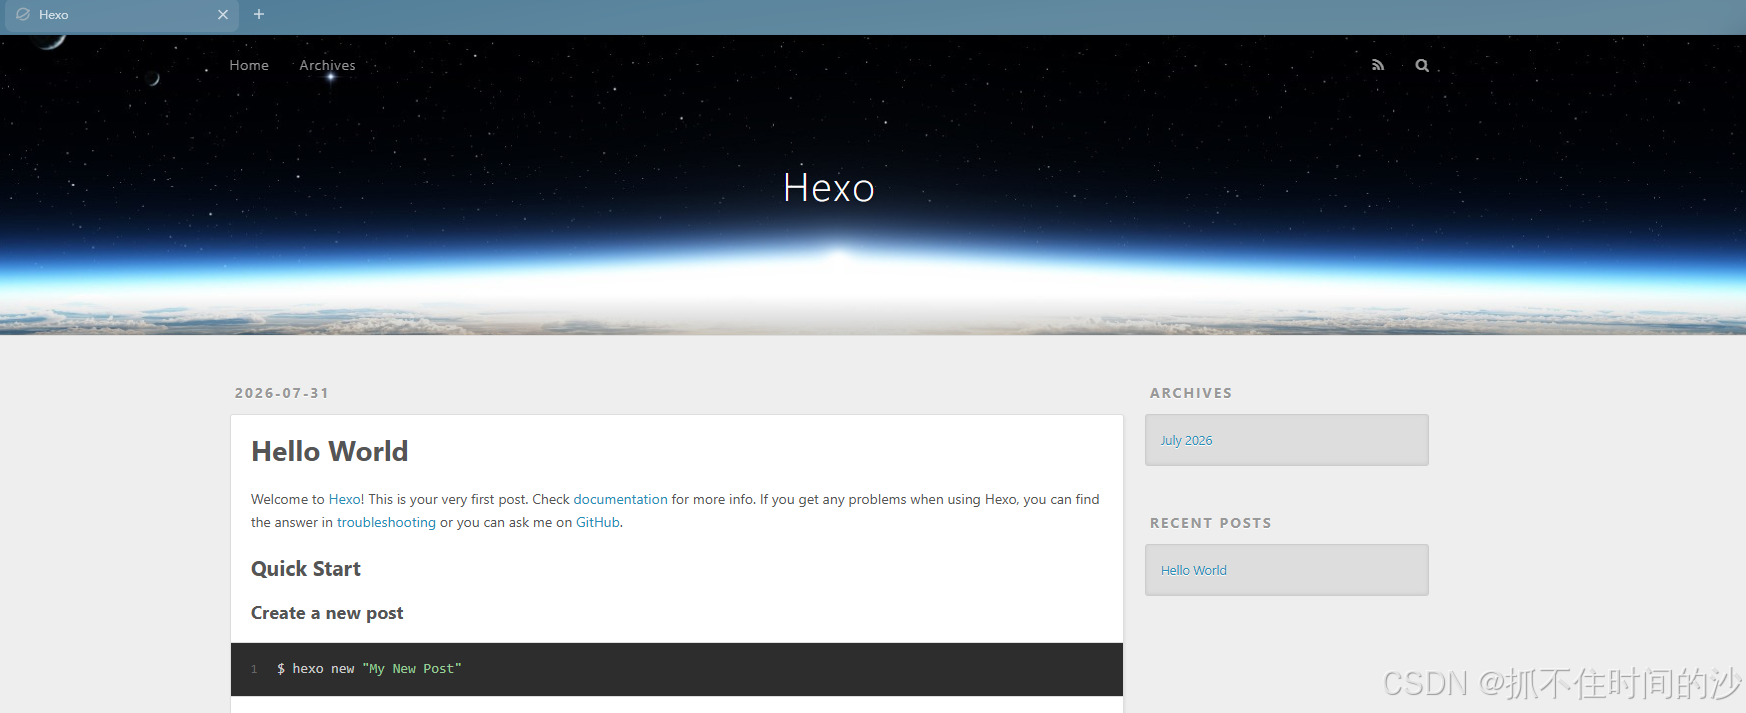
每次新建文章或者修改配置都执行三步
本地预览
1 | hexo clean && hexo g && hexo s |
部署到远程 github 仓库
1 | hexo clean && hexo g && hexo d |
三,修改主题,美化主题
1,进入博客文件夹
1 | cd mylog |
下载主题
1 | git clone -b master https://github.com/jerryc127/hexo-theme-butterfly.git themes/butterfly |
2,修改 /root/mylog 目录下的 _config.yml,把主題theme后面的 landscape 改为 butterfly,注意theme: 冒号后面有空格
1 | theme: butterfly |
或者用命令直接替换 _config.yml 中的主题配置
1 | sed -i 's/theme: .*/theme: butterfly/' _config.yml |
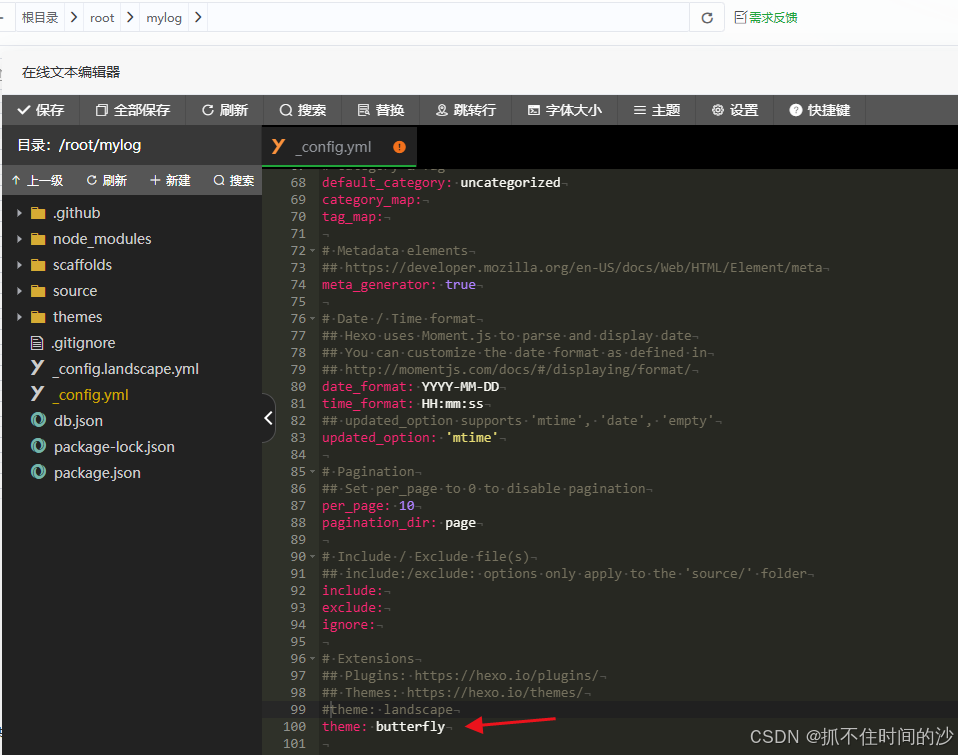
3,创建主题配置文件,更新主题配置不会丢失
1 | cp themes/butterfly/_config.yml _config.butterfly.yml |
4,安装插件
1 | npm install hexo-renderer-pug hexo-renderer-stylus --save |
重新启动
1 | hexo clean && hexo g && hexo d |
配置参考官方文档,Hexo官方文档
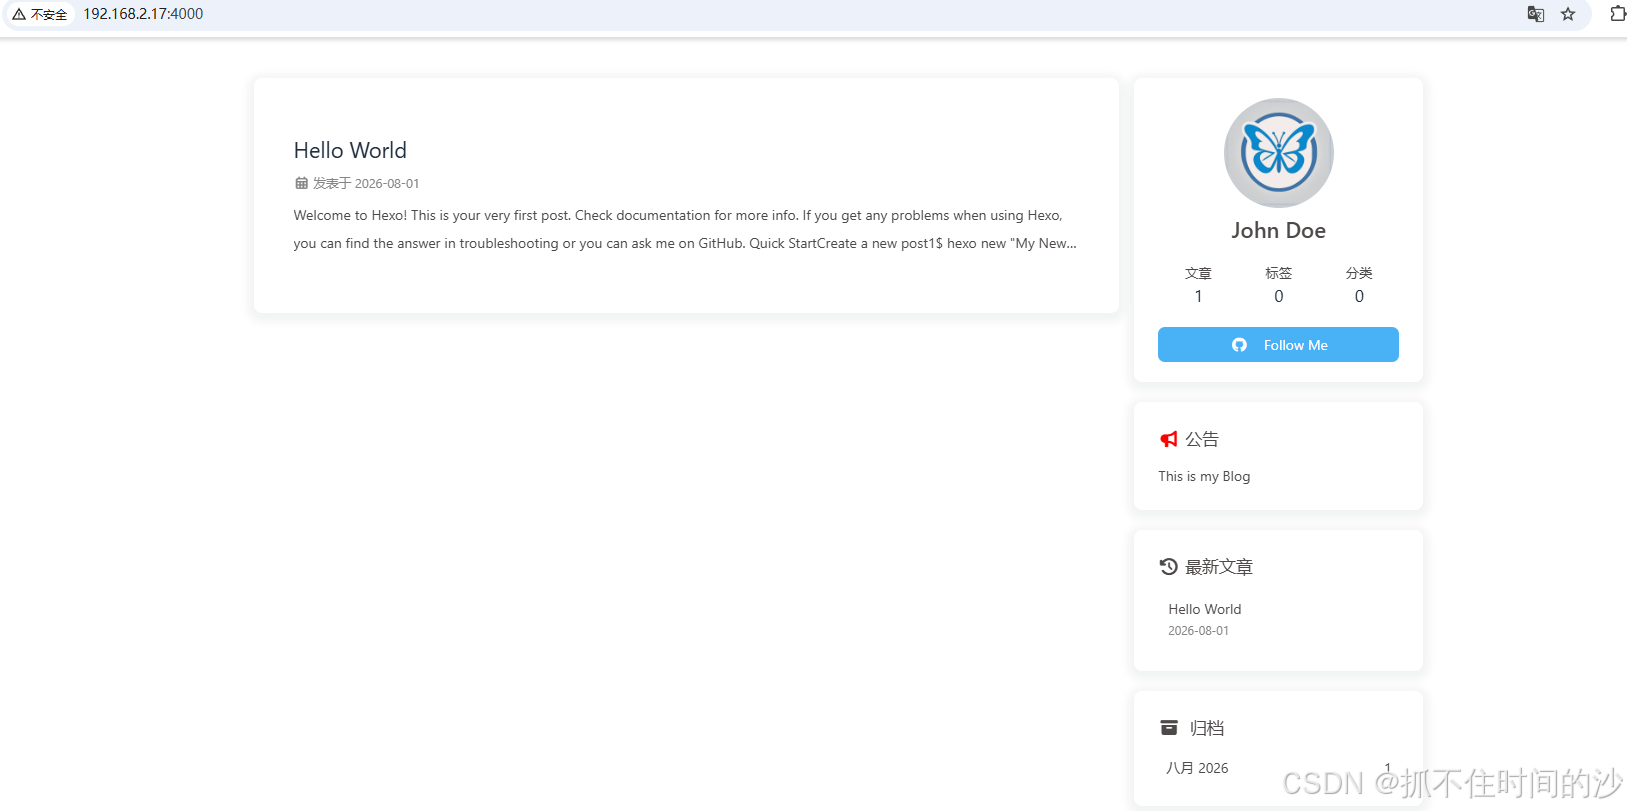
也可以直接上传主题文件到 /root/mylog/themes 目录下,然后解压,修改 /root/mylog 目录下的 _config.yml,加 # 号注释原来的 #theme: *****,新增一句 theme: xxxx (注意冒号后面有空格),xxxx为 themes/ 文件夹下主题文件夹名称
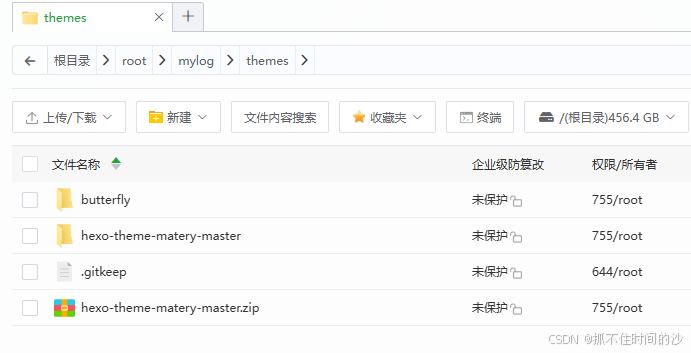
修改 /root/mylog 目录下的 _config.yml,对应主题文件名
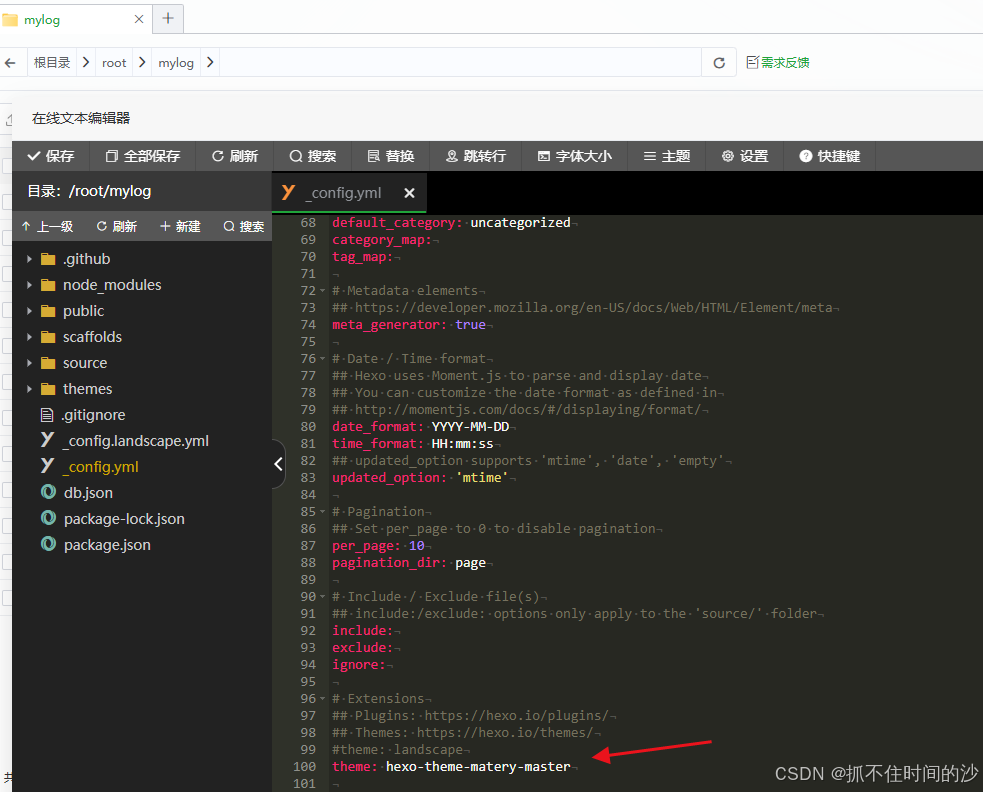
修改后重新启动 hexo
1 | hexo clean && hexo g && hexo d |
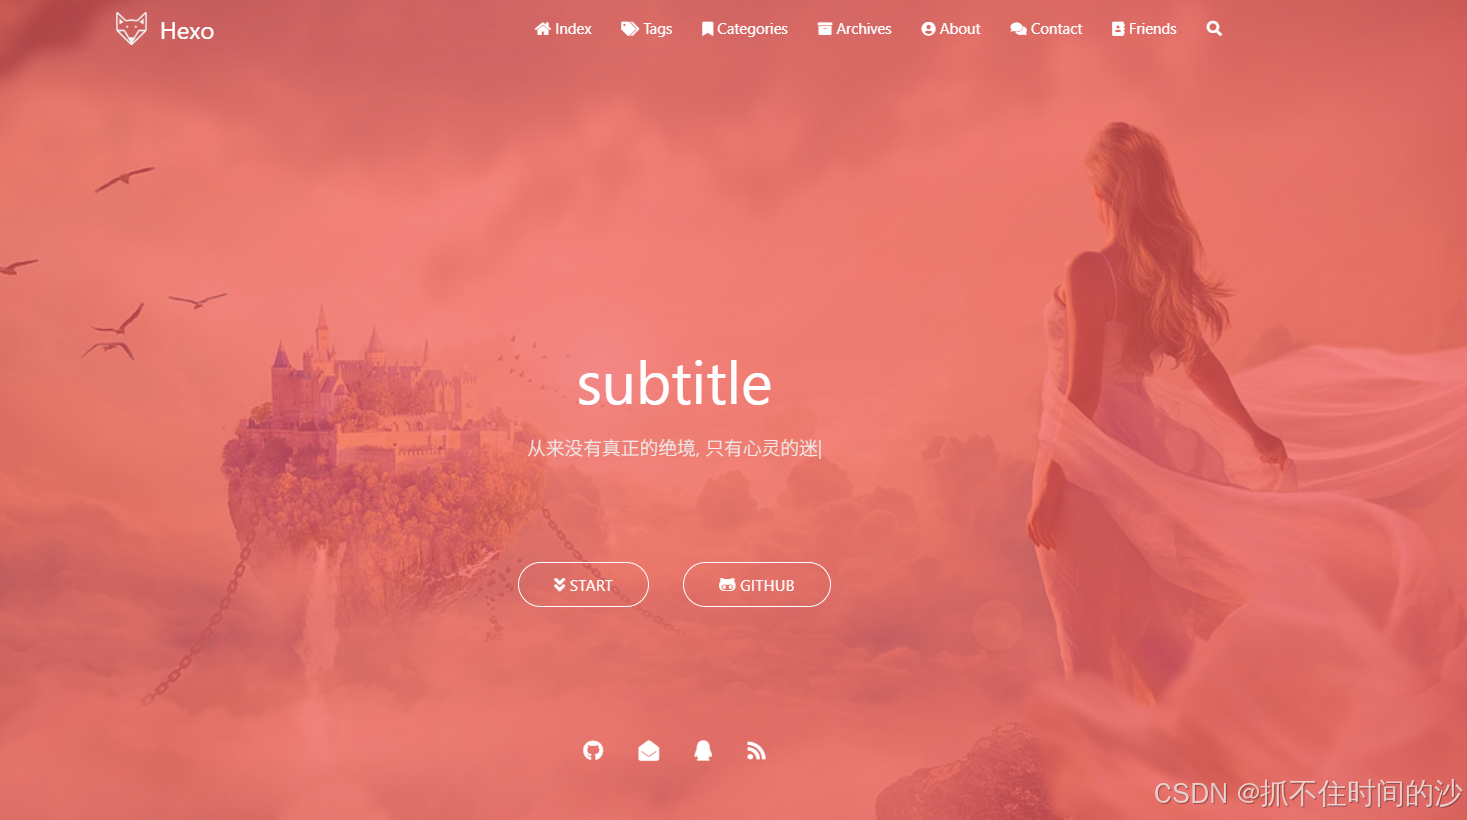
主题下载
主题1,下载地址
主题2,下载地址
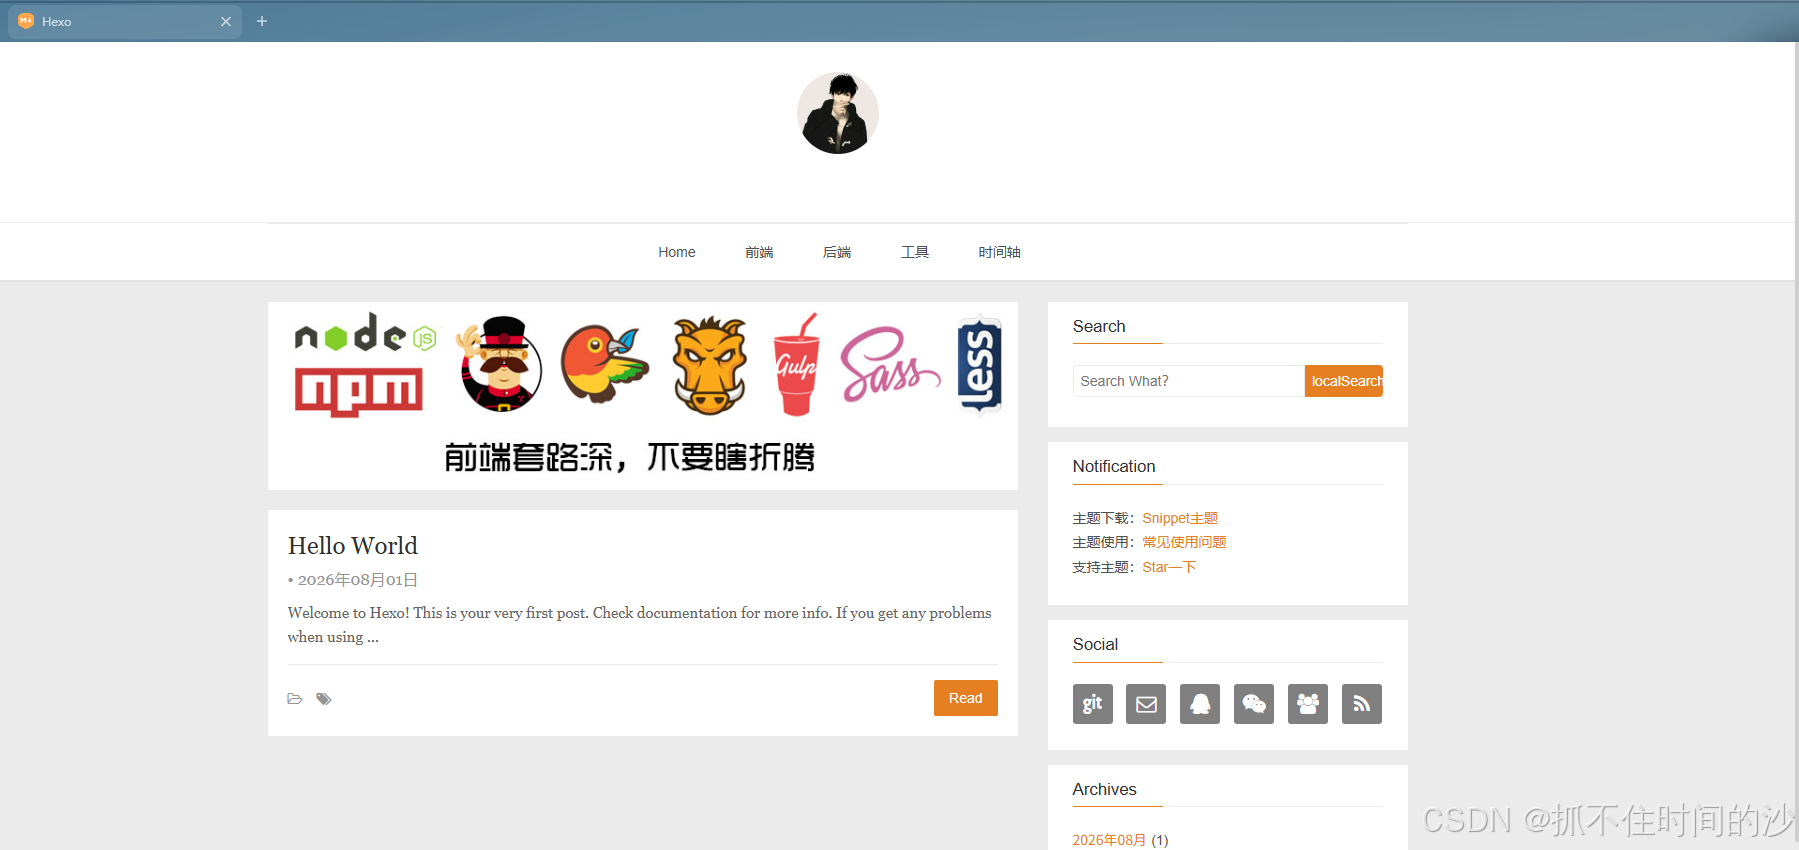
主题3,下载地址
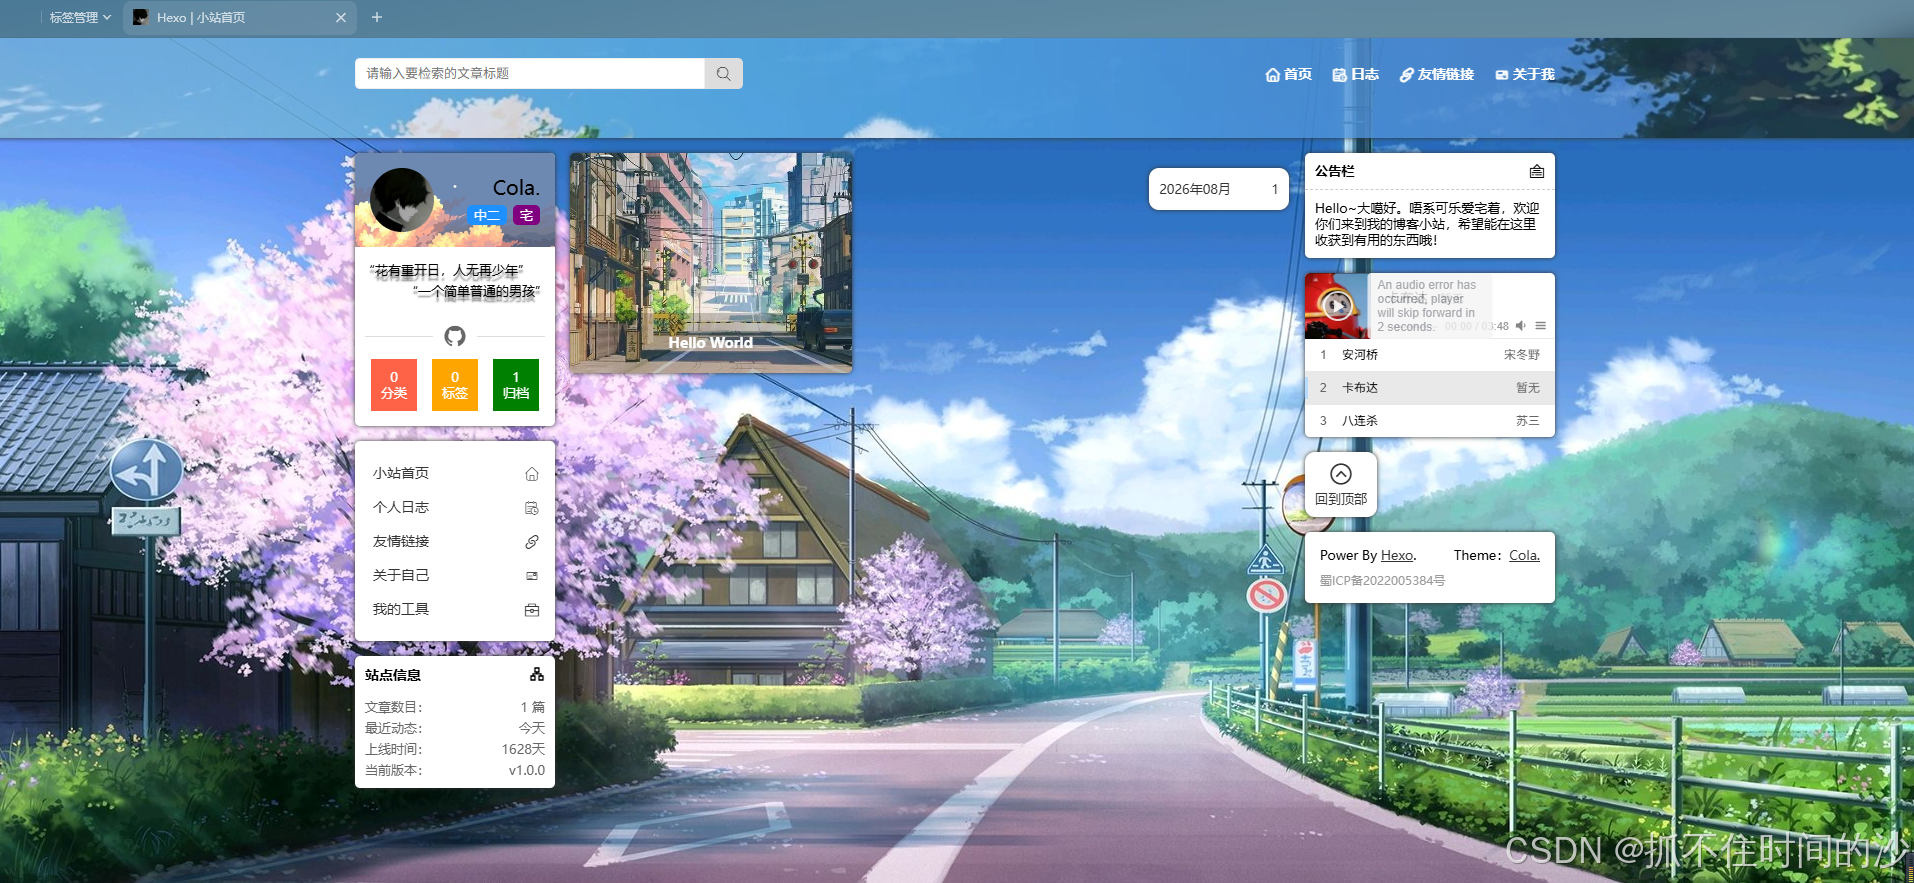
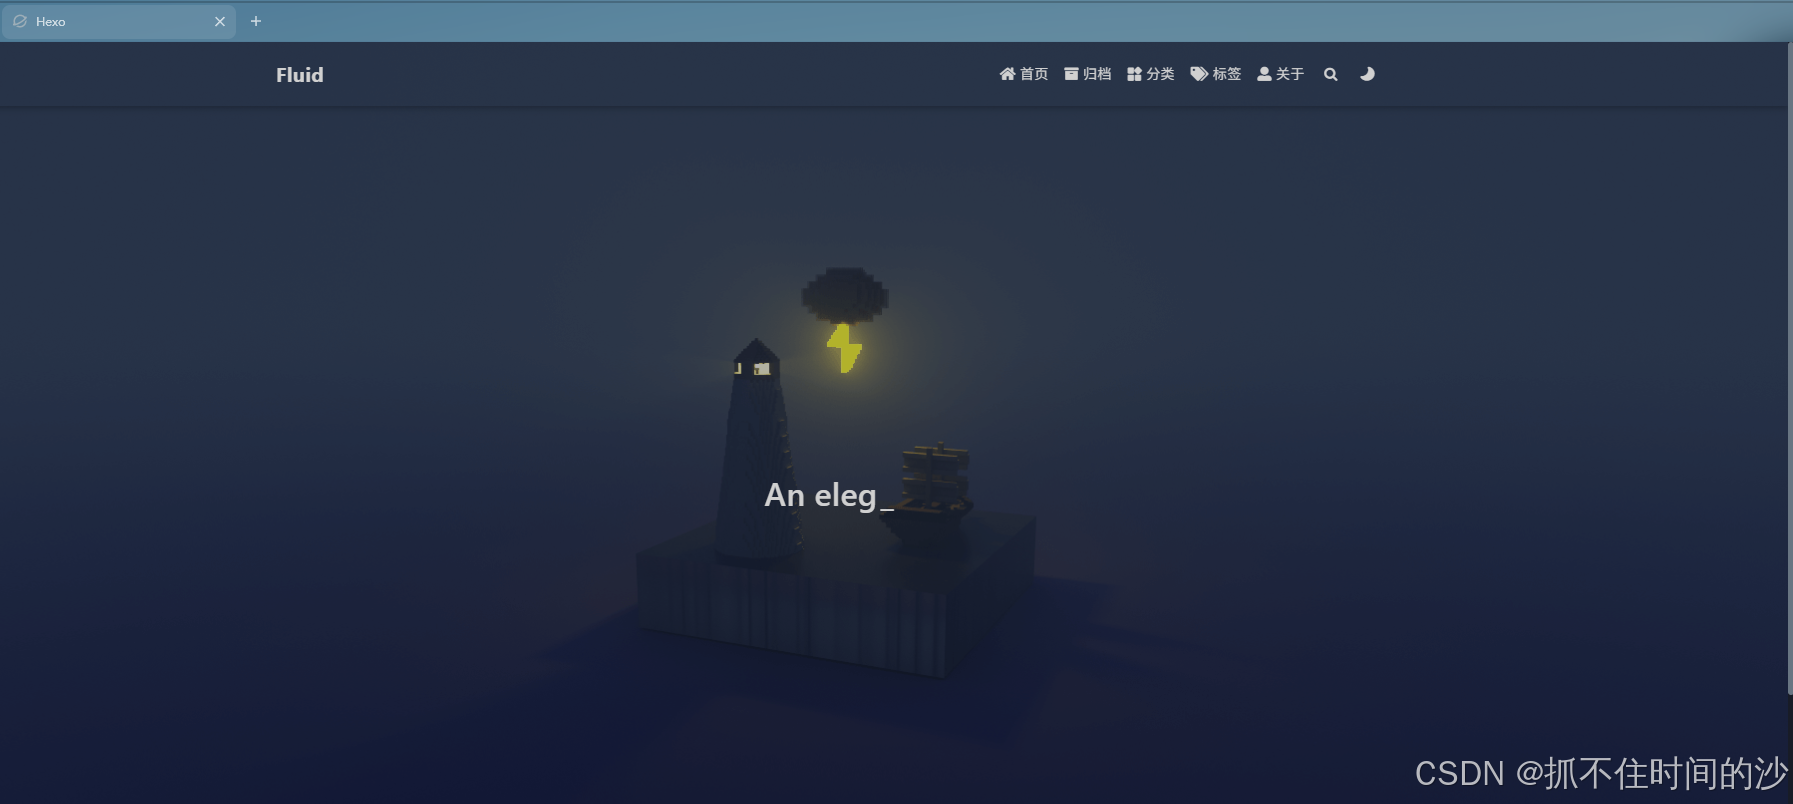
配置指南,Hexo Fluid 用户手册
hexo主题网站,主题网站
①Fluid 安装,进入博客目录执行命令
1 | npm install --save hexo-theme-fluid |
②拉取 Fluid 主题成功后 theme 目录下没有 fluid 文件夹,创建软链接,执行下边命令
1 | ln -s node_modules/hexo-theme-fluid themes/fluid |
③创建主题配置文件,更新主题配置不会丢失
1 | cp themes/fluid/_config.yml _config.fluid.yml |
④编辑 _config.fluid.yml 来个性化你的博客(比如修改导航栏、首页信息、颜色主题等)参考这里
修改根目录的 _config.yml
1 | theme: fluid |
或者用命令直接替换 _config.yml 中的主题配置
1 | sed -i 's/theme: .*/theme: fluid/' _config.yml |
四,部署到远程仓库GitHub
1,注册github账号,github官网
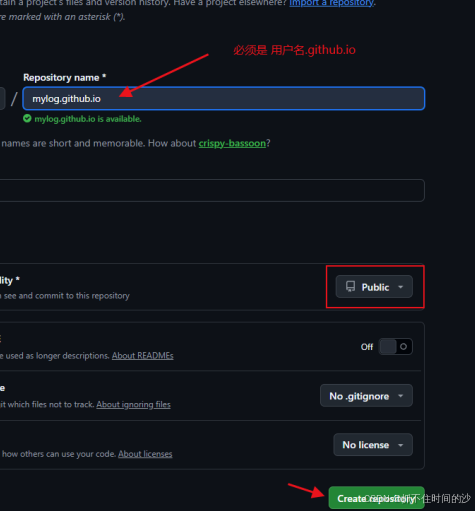
2,新建仓库,仓库名最好和用户名一样,这里只做演示,和用户名一样,github 博客地址就是 https://用户名.github.io/ 短网址,而不是 https://用户名.github.io/仓库名.github.io/ 长网址
用户名格式需要注意,必须是 用户名.github.io
3,添加远程仓库地址
新建的仓库初始化一下,再添加远程地址
1 | git init |
1 | git remote add origin git@github.com:你的用户名/你的仓库名.git |
验证远程仓库是否关联成功
1 | git remote -v |
4,安装 Hexo 部署插件(用于将静态文件部署到 GitHub)
1 | npm install hexo-deployer-git --save |
5,修改 /root/mylog 目录下_config.yml 底部 deploy 位置
1 | deploy: |
6,配置SSH钥匙,用 hexo d 部署需要设置一下
1 | #输入自己的邮箱地址,创建一对密钥 |
查看公钥
1 | cat ~/.ssh/id_ed25519.pub |
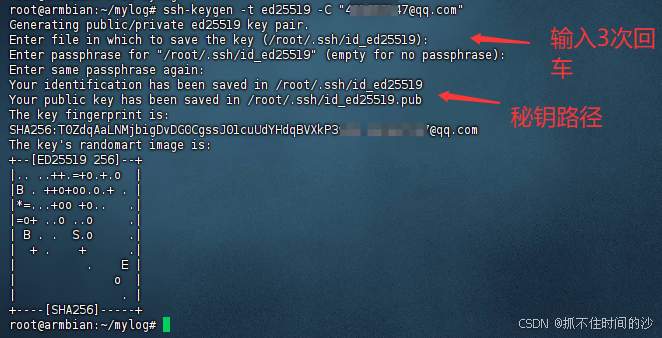
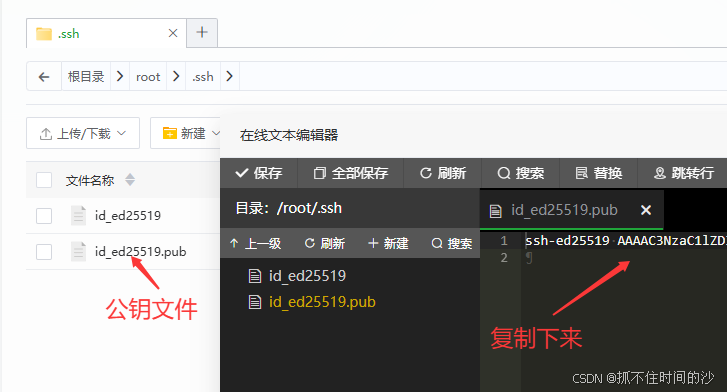
秘钥位置在 /root/.ssh 文件下,后缀是pub,这个是公钥,把公钥的内容复制下来,到 github,点你的头像,有个 setting,进去后点 SSH and GPG keys 点击 New SSH key
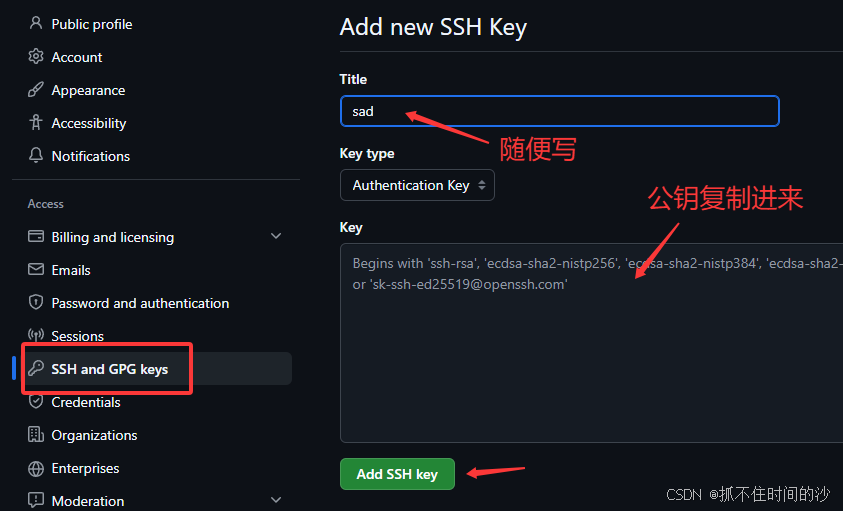
配置好公钥了,检查一下,输入 yes
1 | ssh -T git@github.com |

SSH 认证已经成功
7,设置用户信息
1 | git config --global user.name "github名字" #用户名 |
检查一下,输入 yes
1 | ssh -T git@github.com |
然后执行部署命令
1 | hexo clean && hexo g && hexo d |
部署成功后 github 仓库会多出来文件
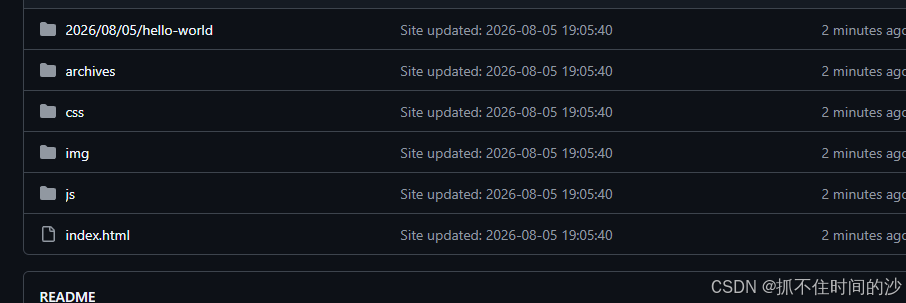
8,打开仓库,在 Pages 设置页面打开 main 分支,然后点击 Save,最好看一下 _config.yml 里面是哪个分支
重要提示:GitHub Pages 设置的发布分支必须与 _config.yml 中 deploy 配置的 branch 保持一致。如果您的 _config.yml 中配置的是 branch: main,那么 GitHub Pages 也必须选择 main 分支作为发布源;如果配置的是 branch: master,则需选择 master 分支
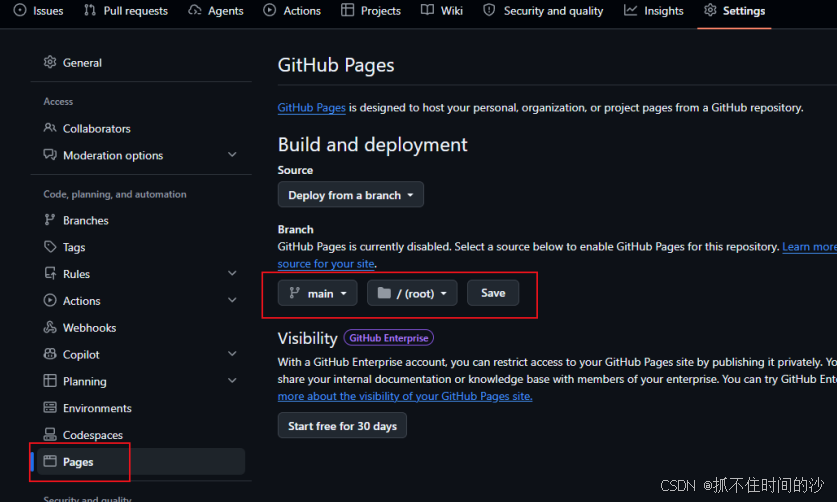
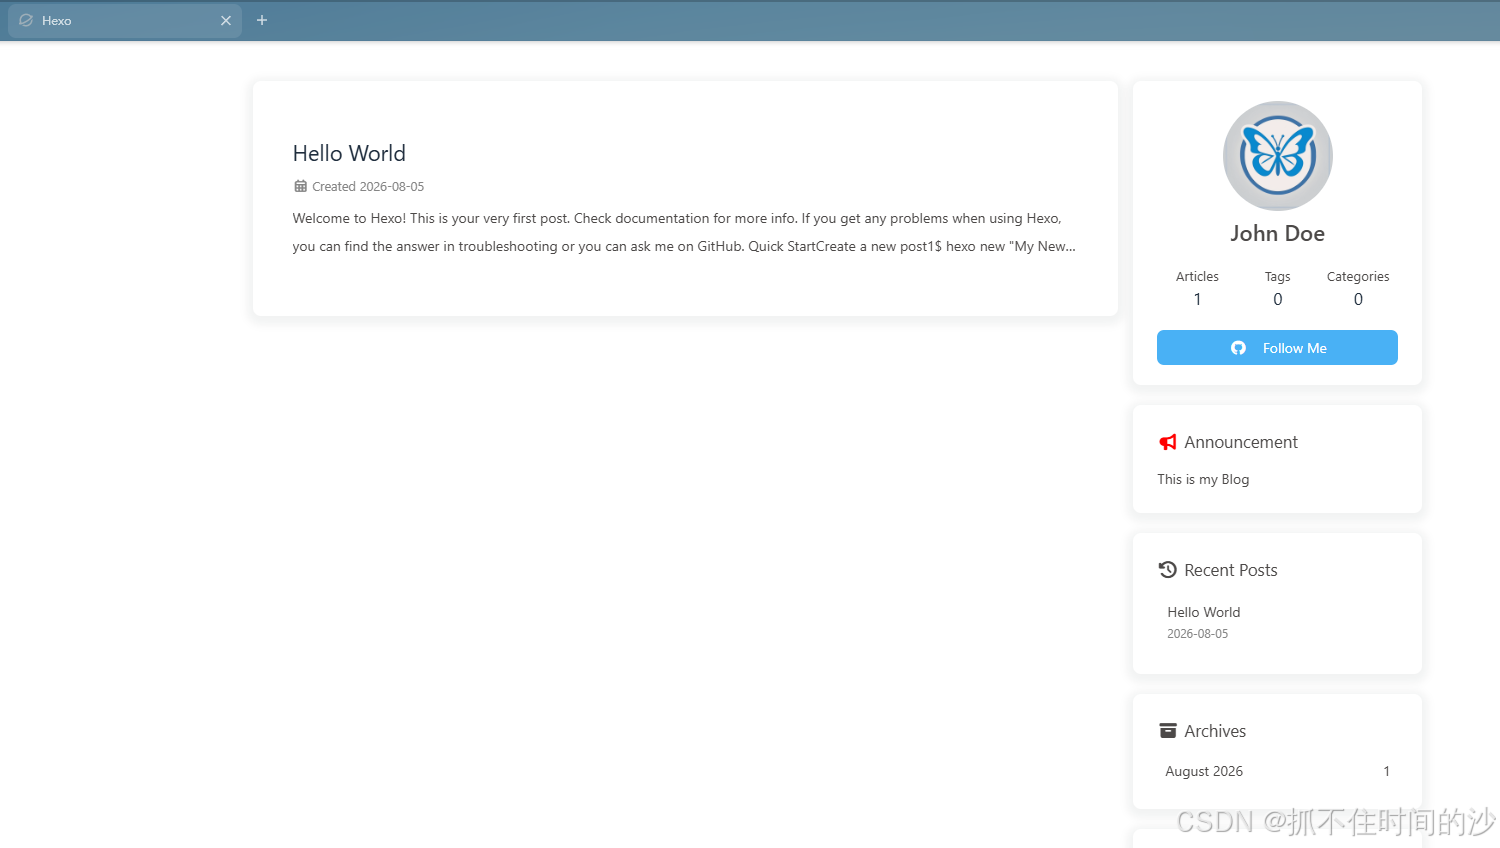
稍等几分钟,就可以打开博客地址了,https://用户名.github.io/
9,创建自动化一键部署博客
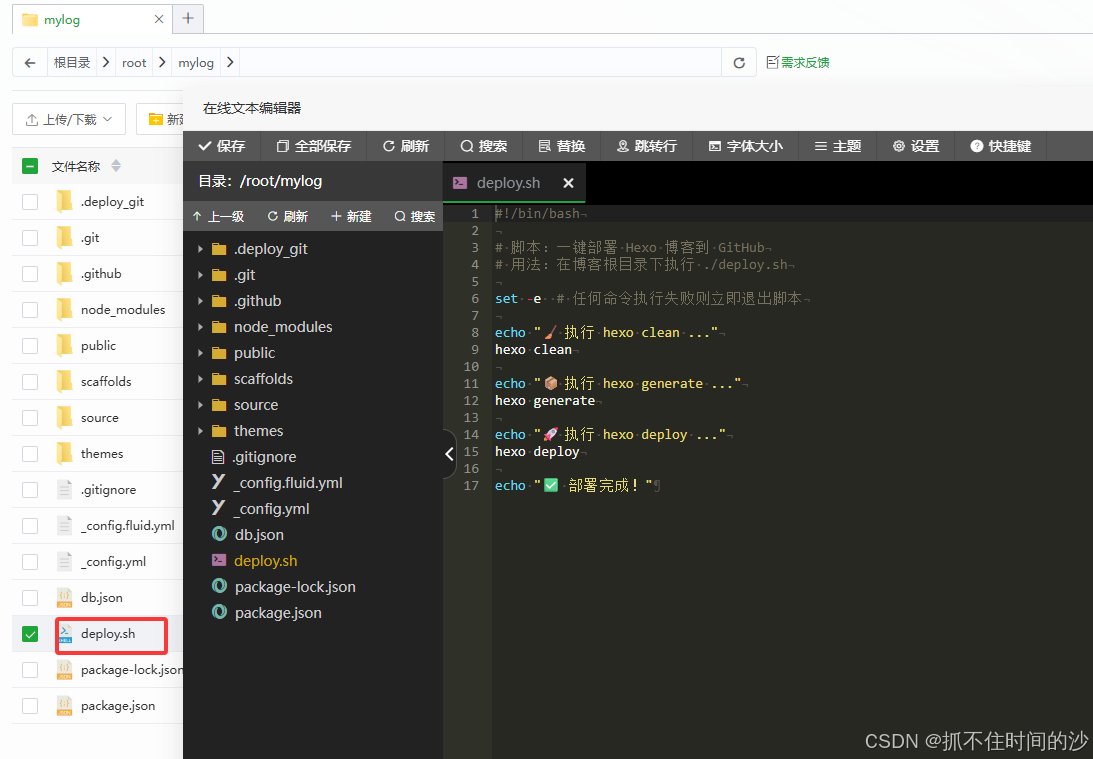
在 hexo 根目录手动创建 deploy.sh 文件,添加下面的进去
1 |
|
每次写文章或是修改了配置,推送到 github,执行下面命令即可
1 | cd mylog && ./deploy.sh |
至此 N1 搭建 hexo 部署到 github 已完成
五,日常写文章并发布
进入hexo 目录
1 | cd mylog |
这会在 source/_posts/ 下生成一个 Markdown 文件
用任意编辑器(VS Code、Typora 等)打开生成的 .md 文件,复制下面的进去替换
1 | --- |
然后写正文即可
编辑好文章后重新执行,部署到 github 仓库
1 | hexo clean && hexo g && hexo d |
设置每次新建文章时自动添加文章标题
进入博客目录并编辑 scaffolds/post.md,里面内容全部删掉,把下面的复制进去
1 | --- |
常用命令就以下几个
hexo n:写文章
hexo s:本地预览
hexo g:生成页面
hexo d:部署上线
hexo clean:清缓存
六,备份源码,上传到 github 仓库备份
在 Hexo 根目录新建 .gitignore 文件添加排除 列表
1 | node_modules/ |
1 | #添加所有源码文件,进入博客目录执行 |
七,hexo 瘦身,可以放心删除的目录/文件
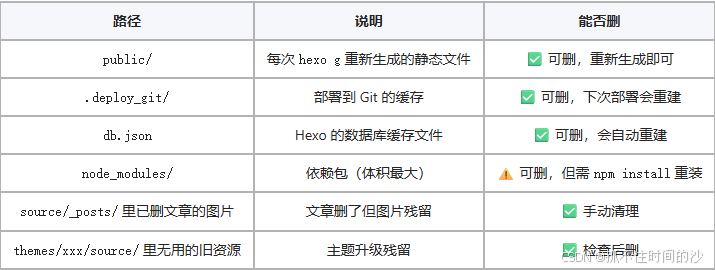
推荐的安全清理命令
1 | # 1. 清理生成缓存和部署缓存(最常用,最安全) |
八,常见问题,这里查看
看到这里,斐讯N1 hexo 博客就部署完成了,感谢耐心阅读!
 微信
 支付宝